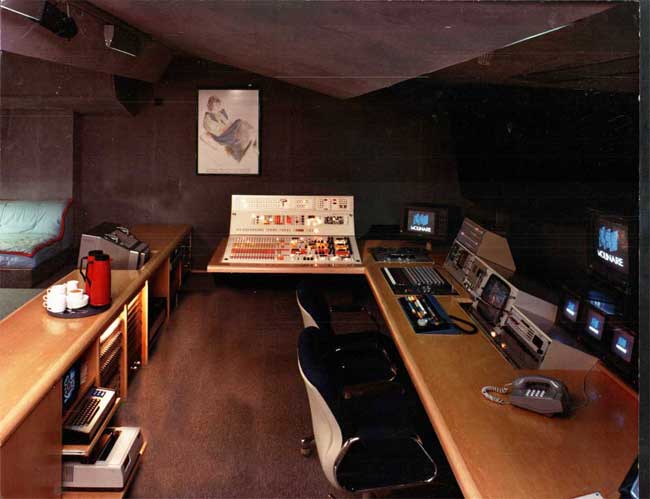
Way back in June 1982, I opened four new edit suites at Molinare. The cost? About a million each with Grass Valley and ADO digital effects. All four suites looked like this but with different paintings. We charged $600 an hour for a basic three machine edit plus $200 an hour for digital effects like ADO (Ampex Digital Optics).
What you see is just the tip of the iceberg. The Grass Valley 300 vision switcher with Mark II DVE at the far end is really just a remote control panel. The rack of electronics is elsewhere in air conditioned luxury. Ditto the CMX340 editing electronics — plus VTRs of all shapes and sizes, in another room on another floor.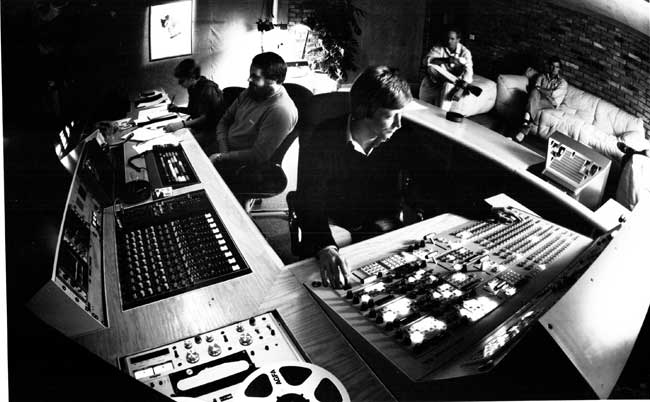
Here’s a shot in the same room taken from behind the vision switcher. Same edit suite but with dressed with people. I’m there at the back sitting crossed legged on the expensive Roche Bobois sofa wondering if it will ever pay for itself.
Center frame is editor, Phil Stone, programming the GVG switcher, which is fired off by the CMX 340 editor – its panel is the small keyboard on far left, near the pretend client. Out of sight are 20 VTRs of all shapes and sizes, all route-able to this or any other edit suite.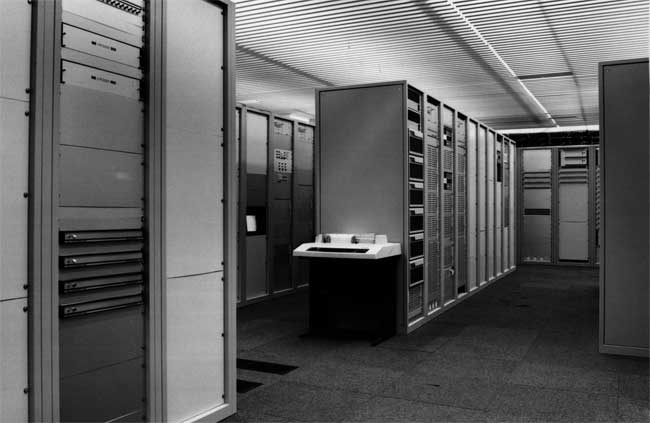
Making the whole thing work are racks and racks of electronics on the next floor up plus a collection of VTRs, tape ops. and engineers. All on the scrap heap now, the hardware – not the people.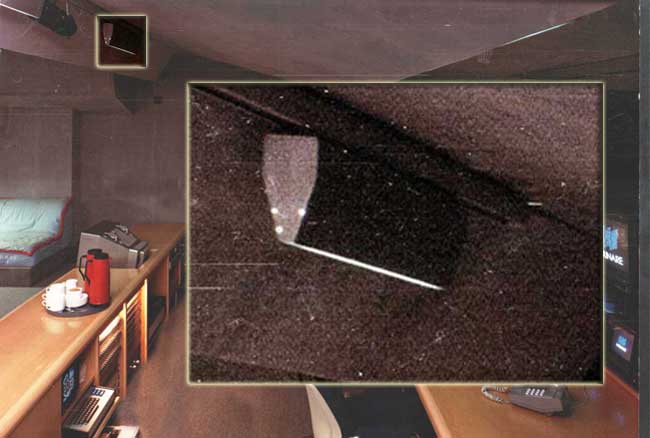
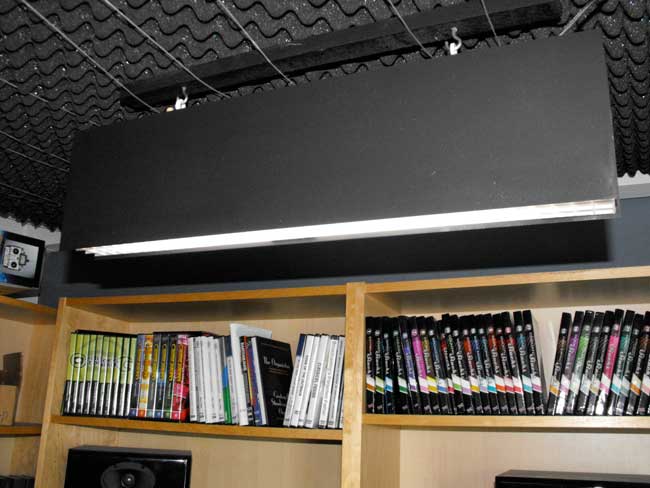
But let’s go back to the color photo. Look at the top left hand corner. See the lights in the ceiling? Here’s a blow up – I’m sorry the print is old and scratched. The suite’s lighting was designed and built by my own precision engineer, Bill Curtis,
Two 5000°K daylight fluorescent Curtis fittings are fixed to the lighting track.
Bill made at least 20 of these light fittings for our editing suites, telecine rooms and outside broadcast trucks. The shaft of light is the correct daylight color temperature, doesn’t hit the monitors or shine in people’s eyes. Besides the chairs, the coffee flask and mugs, this light the only item in the color photo that’s still any use today.
My 1980 Molinare video on YouTube has several Curtis lights in it.
RIG OF THE DAY
Every morning, I go to my favorite Web pages. Now, this may seem like a diversion, but, trust me, it’s not.
I always wind up at Final Cutters and go to “Rig of The Day.” A rig is what we used to call an edit suite. Good, “rig” is much better. Edit “suite” always sounded pretentious.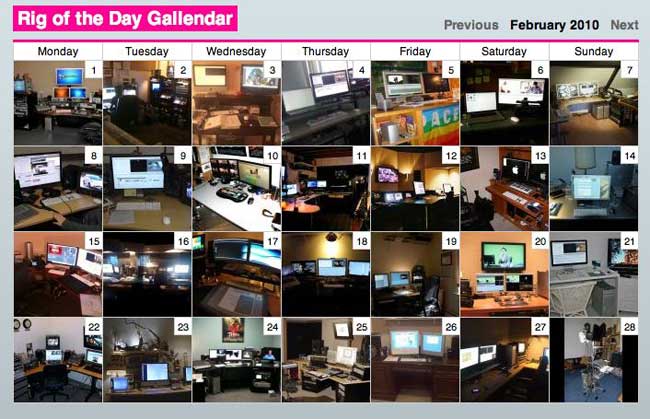
Rig of the Day is an inspired idea from Martin Baker, the “brains” behind the site and their head company, Digital Heaven. According to Martin, the term “rig” is all Mark Raudonis’s fault. Wordsmith Mark has a day job at Bunim-Murray Productions, which makes reality shows.
EDITING LIBERATED
I love Rig of The Day. Thank you Martin. It’s living proof you don’t need to spend big bucks to edit video. Here’s my 2008 submission, as published here.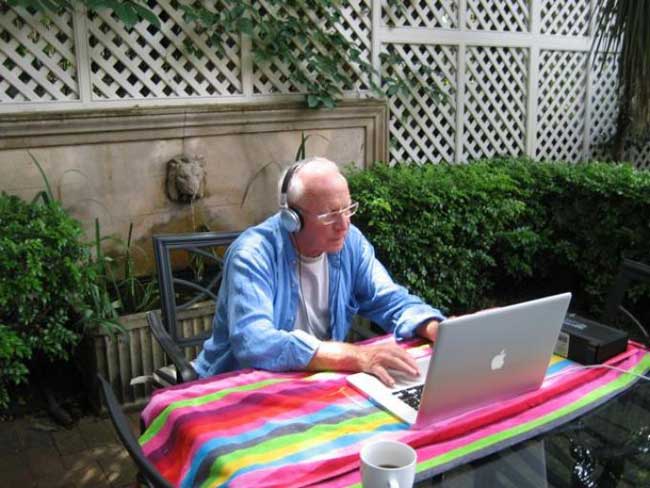
I’m in Sydney, Australia, editing in HD ProRes for my wine film. To the right of the photo is an OWC box with 2 x 1 TB drives connected to a MacBook Pro via a Sonnet SATA card thingy.
Compare my 2008 HiDef rig with my million dollar 1982 Standard Def rig. It’s a joke isn’t it? On the 2008 MacBook I can do digital effects and color grading. I could never do that way back then.
So I lurk on Rig of the Day to see what other filmmakers are doing. Everyone has a different way of working, there’s some crazy stuff going on.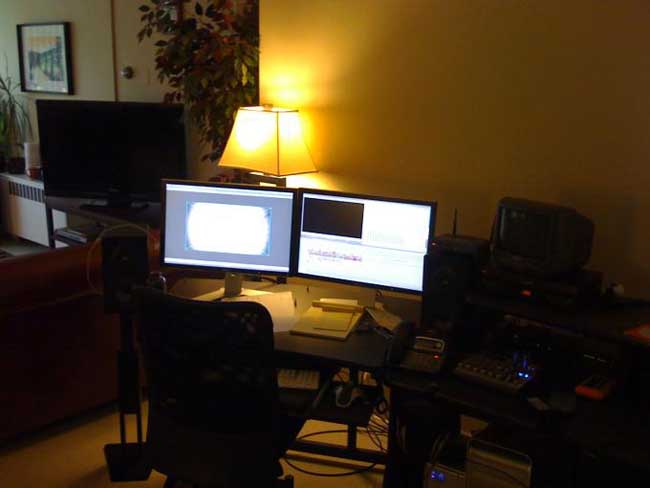
Editing with a table lamp shining in your eyes? Come on. Can anyone work like that?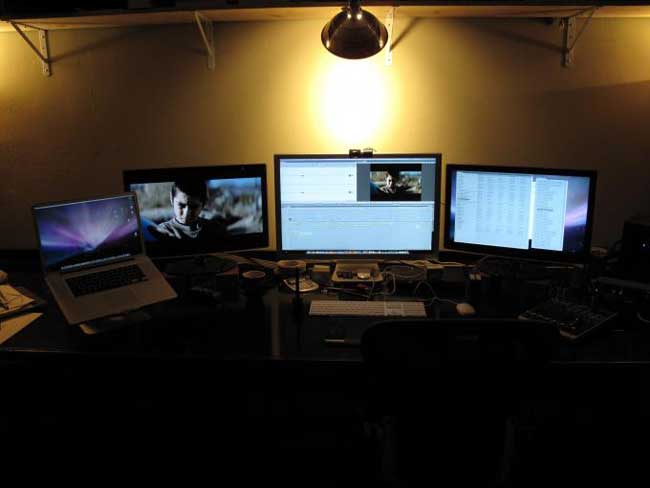
A Home Depot clamp light shining right onto the screens with, once again, the wrong color temperature. The monitors are blue. Why? Read on…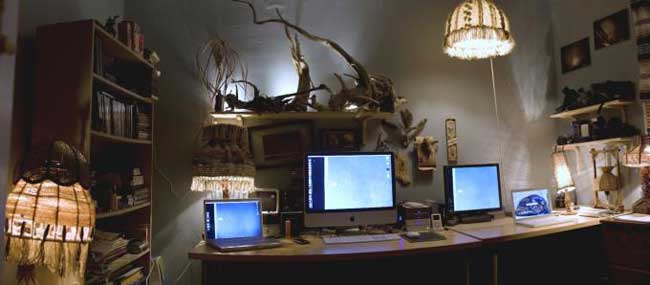
It looks cozy but just ain’t right. Look at those lights. See how the three screens are blue. That’s telling you that the room is lit with household tungsten light. Those all important monitors are daylight color temperature not artificial. Your overhead rig light should be daylight to match. The camera does not lie. You want colorless grey screens, not blue.
NEED LIGHT, NEED BILL
Now it’s time to build my own edit suite in a spare room. I need a Bill Curtis type light. Tough. He’s retired and lives the UK. I am here in the States.
I fool around and make one myself. Here’s how. It won’t look the same as Bill’s, he’d never dream of using Velcro; we had some left over from my pole camera jib project.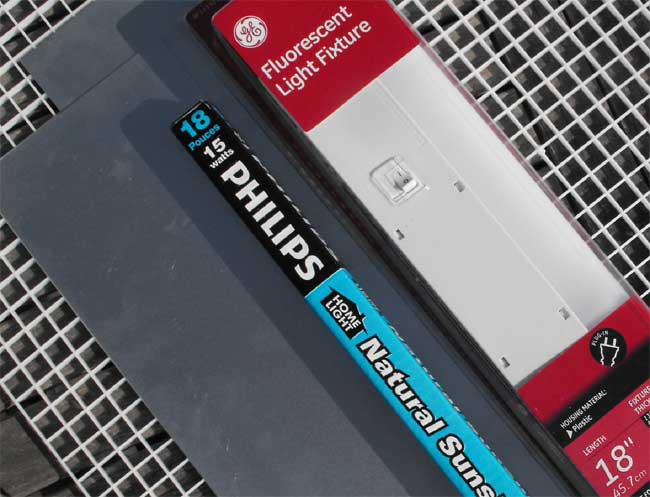
Fluorescent tube (center photo): Philips F15T8/NATURAL SUNLIGHT 18″ (46 cm) 15-watt 5000°K T8. I bought mine at Home Depot @ $7.97
Light Fixture (in photo – far right): GE Fluorescent Light Fixture 18″ Basic standard plastic T8 (comes with an unwanted warm white tube) Home Depot @ $9.77
Egg crate plastic diffuser: white louver Home Depot 2′ x 4′ @ $11.87
Side panels (sprayed black – left in photo): two aluminum sheets 6″x 24″, .025″ thickness mill finish by Steelworks Boltmaster – mine cost $9.47 each from Jackson’s, a local hardware shop — but easy to find on-line.
Velcro Sticky-Back tape Industrial Strength. Buy from Joann Fabric either in store or on-line @ $3.29
Black Spray Paint @ $5.96
CONSTRUCTION INSTRUCTIONS
Starting with the GE light fitting: open it up and pull out the rocker switch. You will need to cut the switch wires. I drilled two holes at the top and fed in new power wires on either side. Join it all up and check out.
Spray the aluminum sheets black, both sides. Too easy. So here’s the hard bit.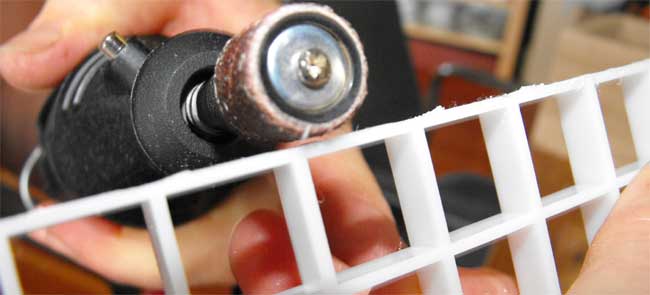
Cut a 2′ by 3 squares deep strip from the sheet of white plastic egg crate. Tricia used her garden secateurs… snip, snip, snip. She took the rough nibs off with her Dremel.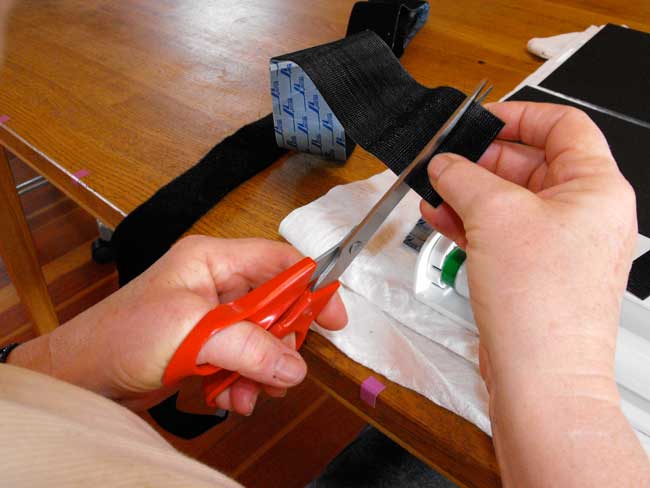
Cut strips from your Velcro rolls.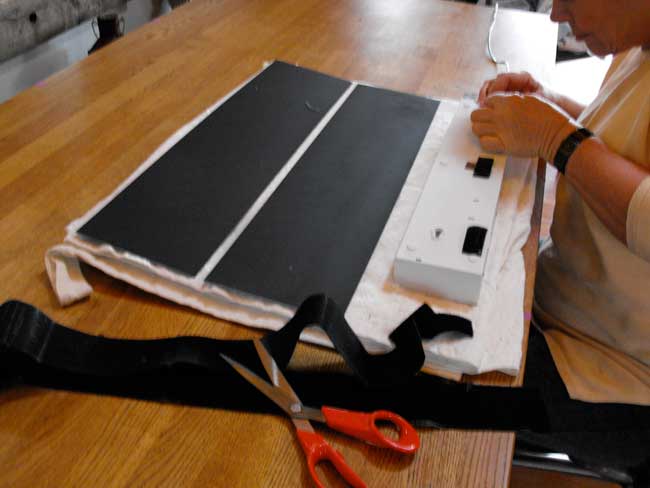
Put the strips on to both sides of the GE light fitting. Stick one side down. Attach the matching strip, sticky side up. Tear off the backing ready for the aluminum plate.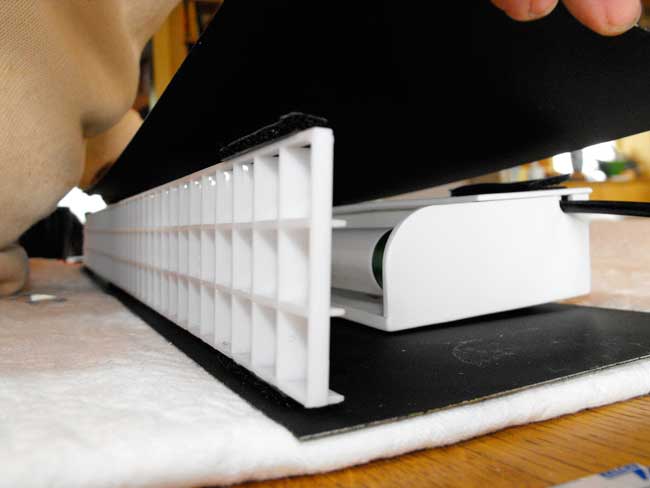
Velcro strips on the grid. Ease the final plate down. Yeah! All done. Hang it up.
I hate flash photography but with natural ambient room lighting you can’t see the fitting. My ceiling is draped with Auralex acoustic foam from Markertek. It really cuts down reverb. and lets me record studio quality voice overs. We hung the foam with strong twine. To add the rig light, we slid in a black wood batten with two cup hooks under the twine.
No camera flash, just my homemade rig light plus a little daylight from a window on the right. See how my edit bench is lit but the light misses the monitors. Want it brighter? Just drop the rig light lower.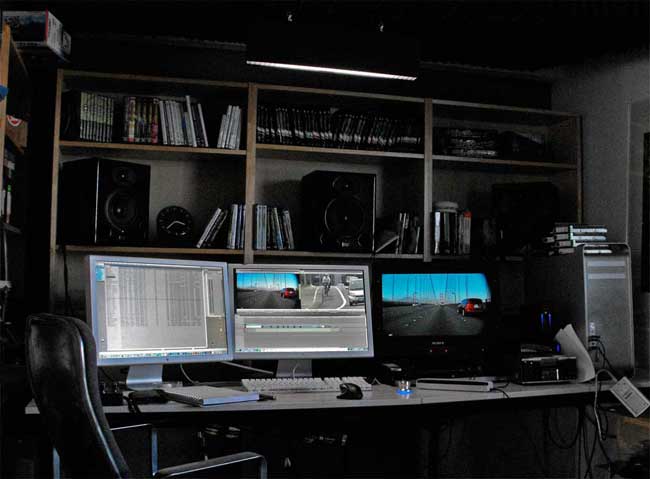
My FinalCut Pro monitors are grey, not blue. My room lighting is perfect. Gloat.
Besides the overhead task light and natural daylight from the window on the right, I have OttLight High Definition Clip-On lamps (model 8298291). List price is $79.99, but Joann regularly has 40% off, making them $47.99 each. Ottlights are the same color temperature as your new rig light. Lash out and get two. I did.
This is a Tungsten-Free Zone. It’s all 100% full-spectrum daylight.
Looks so good, I’d better get back to work.

