What are some of the movie shots that really impressed you? Not whole sequences, just single “gee-whiz” shots. Chances are that those you remember best are high-angle, moving shots. Maybe the opening shot of Orson Welles’ Touch of Evil, the never-ending tracking crane shot to end all crane shots.
One of my favorites is from a Russian film, The Cranes Are Flying. It’s a handheld shot that starts inside a bus, goes outside into the crowd, then flies sky-high, looking down on a convoy of tanks (the cameraman went from walking to riding a crane).

The Cranes Are Flying, 1957 — inside bus, leave bus, push through crowd, fly over tanks — all one shot.
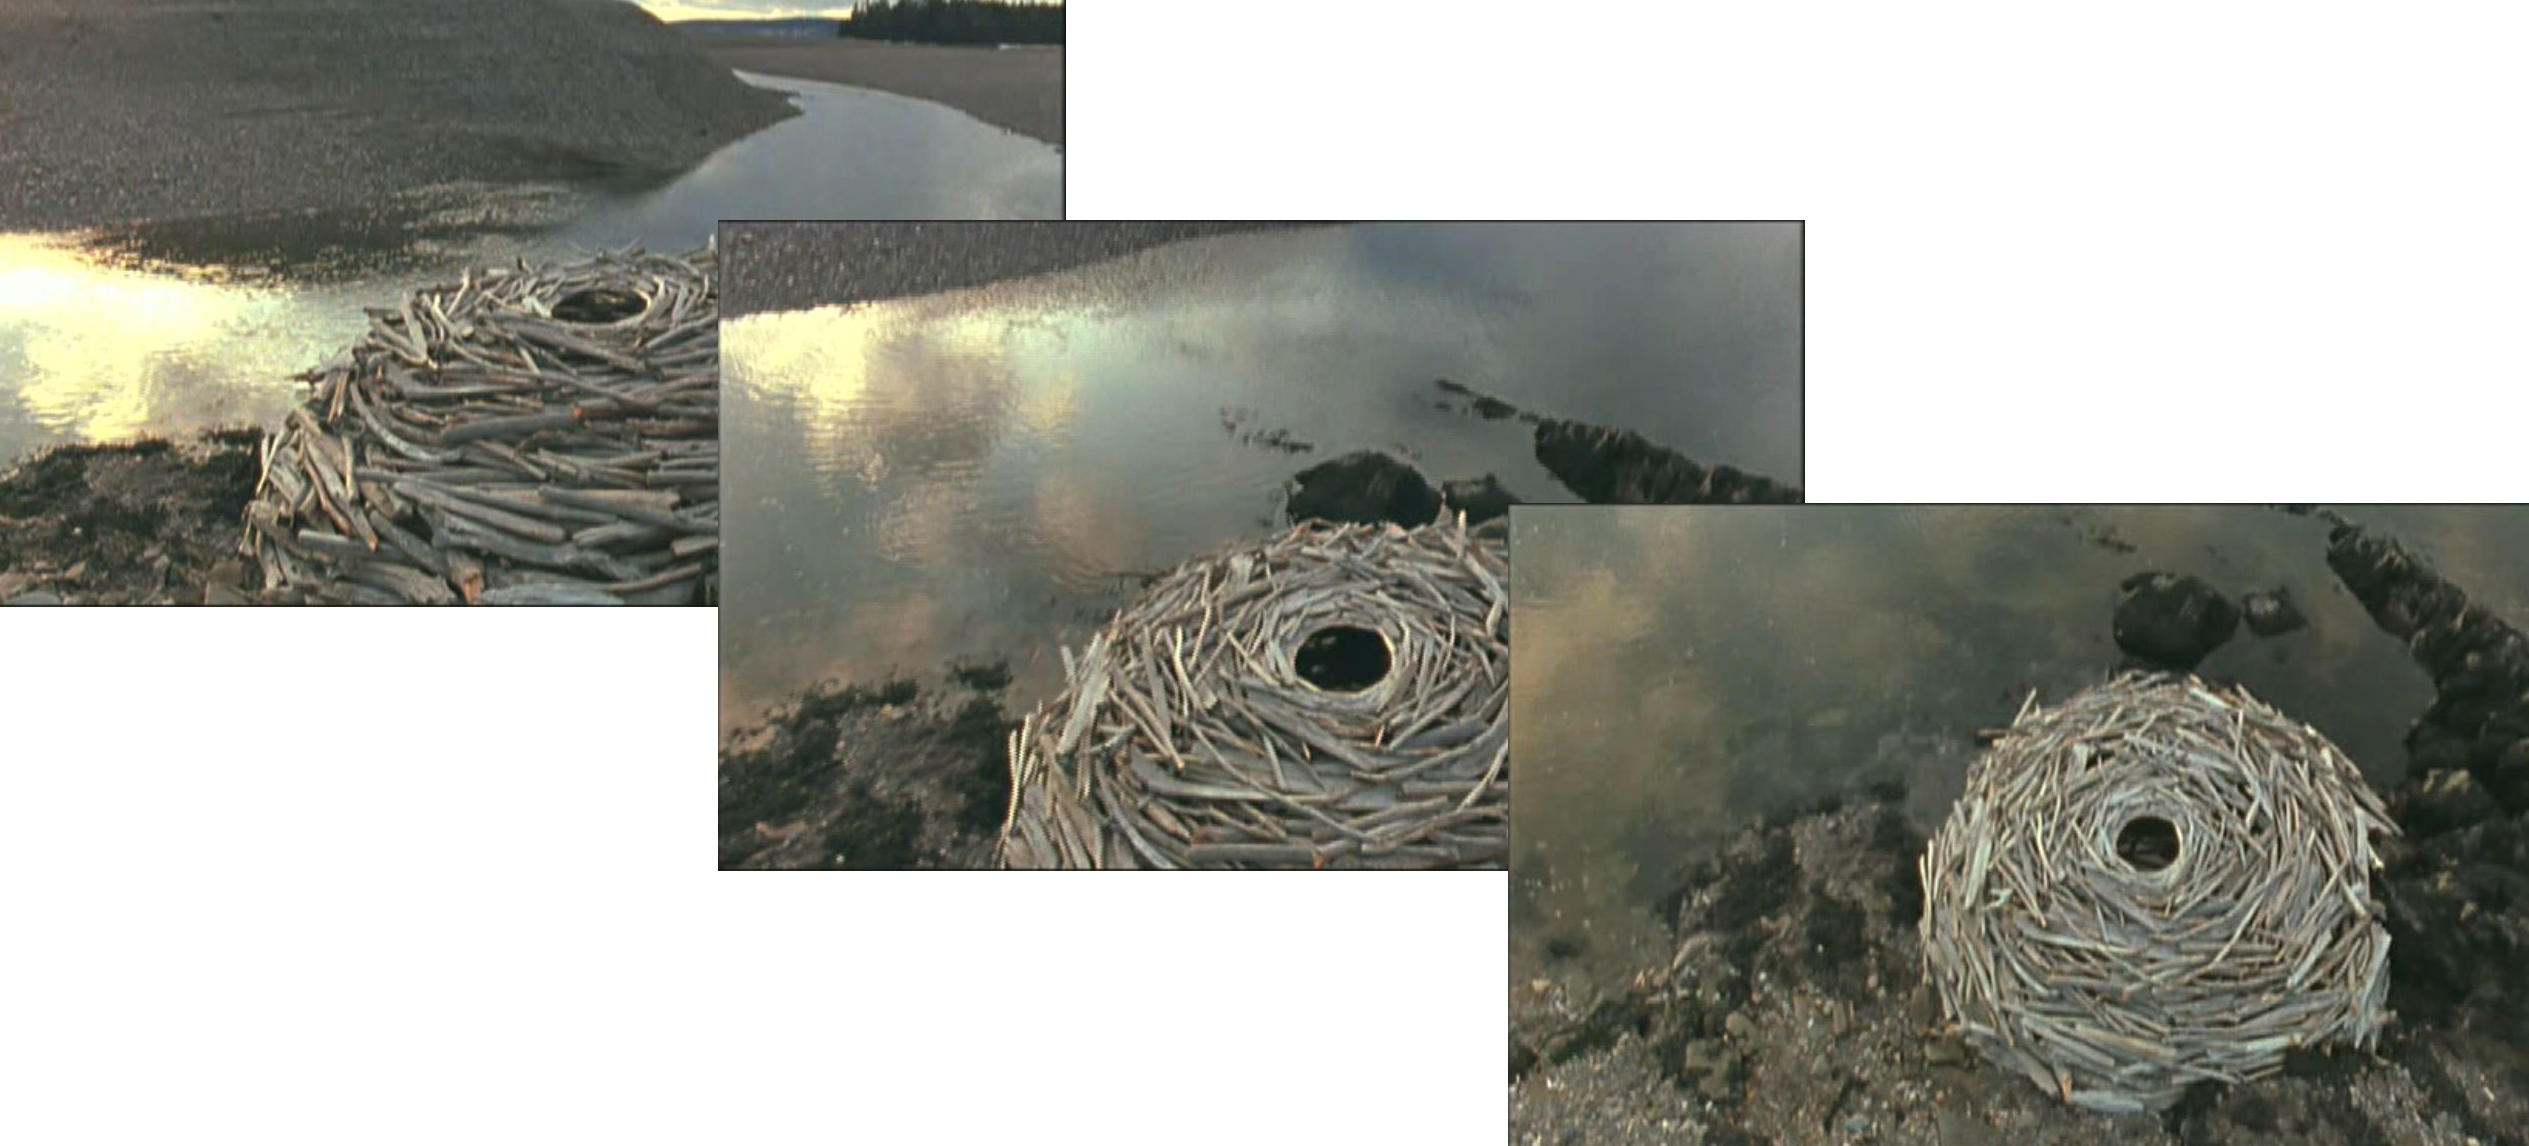
In the world of documentaries, Thomas Riedelsheimer’s Rivers and Tides: Andy Goldsworthy Working with Time makes good use of a lightweight crane. I can’t remember seeing a documentary with such great up-and-over crane shots. I leave the cinema saying, “Got to have a crane, got to have a crane.”
I see the “making-of” and lo … there’s some footage of his crane. It’s a German-built unit from ABC Products. Made out of titanium aluminum alloy with a maximum lift of 14′, weight 13 lb., breaks down to 5.4′ lengths. No one sells them in the U.S. I e-mail ABC. They don’t answer.
So, what’s available locally?
Commercially Available Cranes
I search the ads for off-the-shelf cranes. The Losmandy Porta-Jib? Nope — weighs 45 lb. The Kessler Crane is cheaper and lighter. For $964.95 you get a 12′ reach. Want to pan and tilt with joysticks? Add $1,000. Weight is 30 lb., more than twice the weight of the 2′-longer German model.
I can hardly take out the garbage cans on Sunday night. How could I manage a 30 lb. crane?
I e-mail Germany again. Zilch.
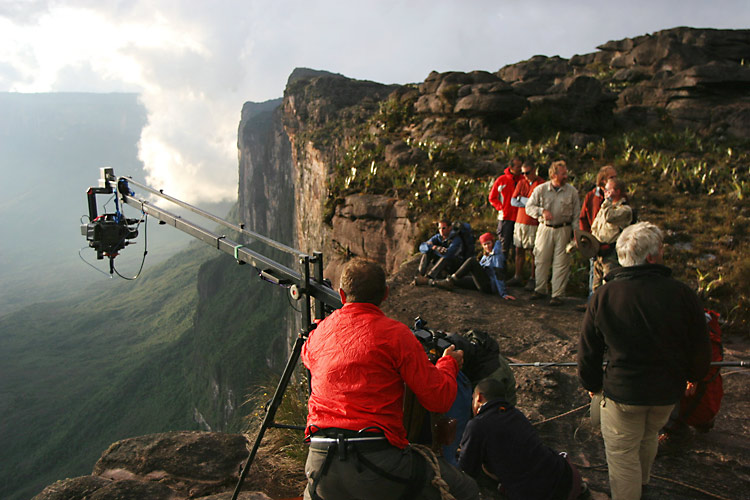
Cambo V40 crane on location. The cameraman has a safety rope around his belt in case it all falls over
A little lighter is the Dutch-made Cambo V40, available from U.S. agent Calumet. With motorized pan and tilt, it’s $15,000.
What’s On The Web?
I turn to Google. Type in “homemade cranes.” Yikes, there are pages and pages of home-built rigs. Everyone’s doing it.
http://homebuiltstabilizers.com/greyjibsncranes.htm
Almost every DIY crane is made from long lengths of chunky aluminum. Fine for tossing into the back of the pickup, but imagine the scene at the Oakland International Airport.
For me, it’s got to be under 5 lb. and no longer than 3′ collapsed.
Is That A Camera On Your Pole? (Or Are You Just Pleased To See Me?)
I’m surfing the Web and I see the amazing video at http://www.polecam.com/in-action/showreel.html
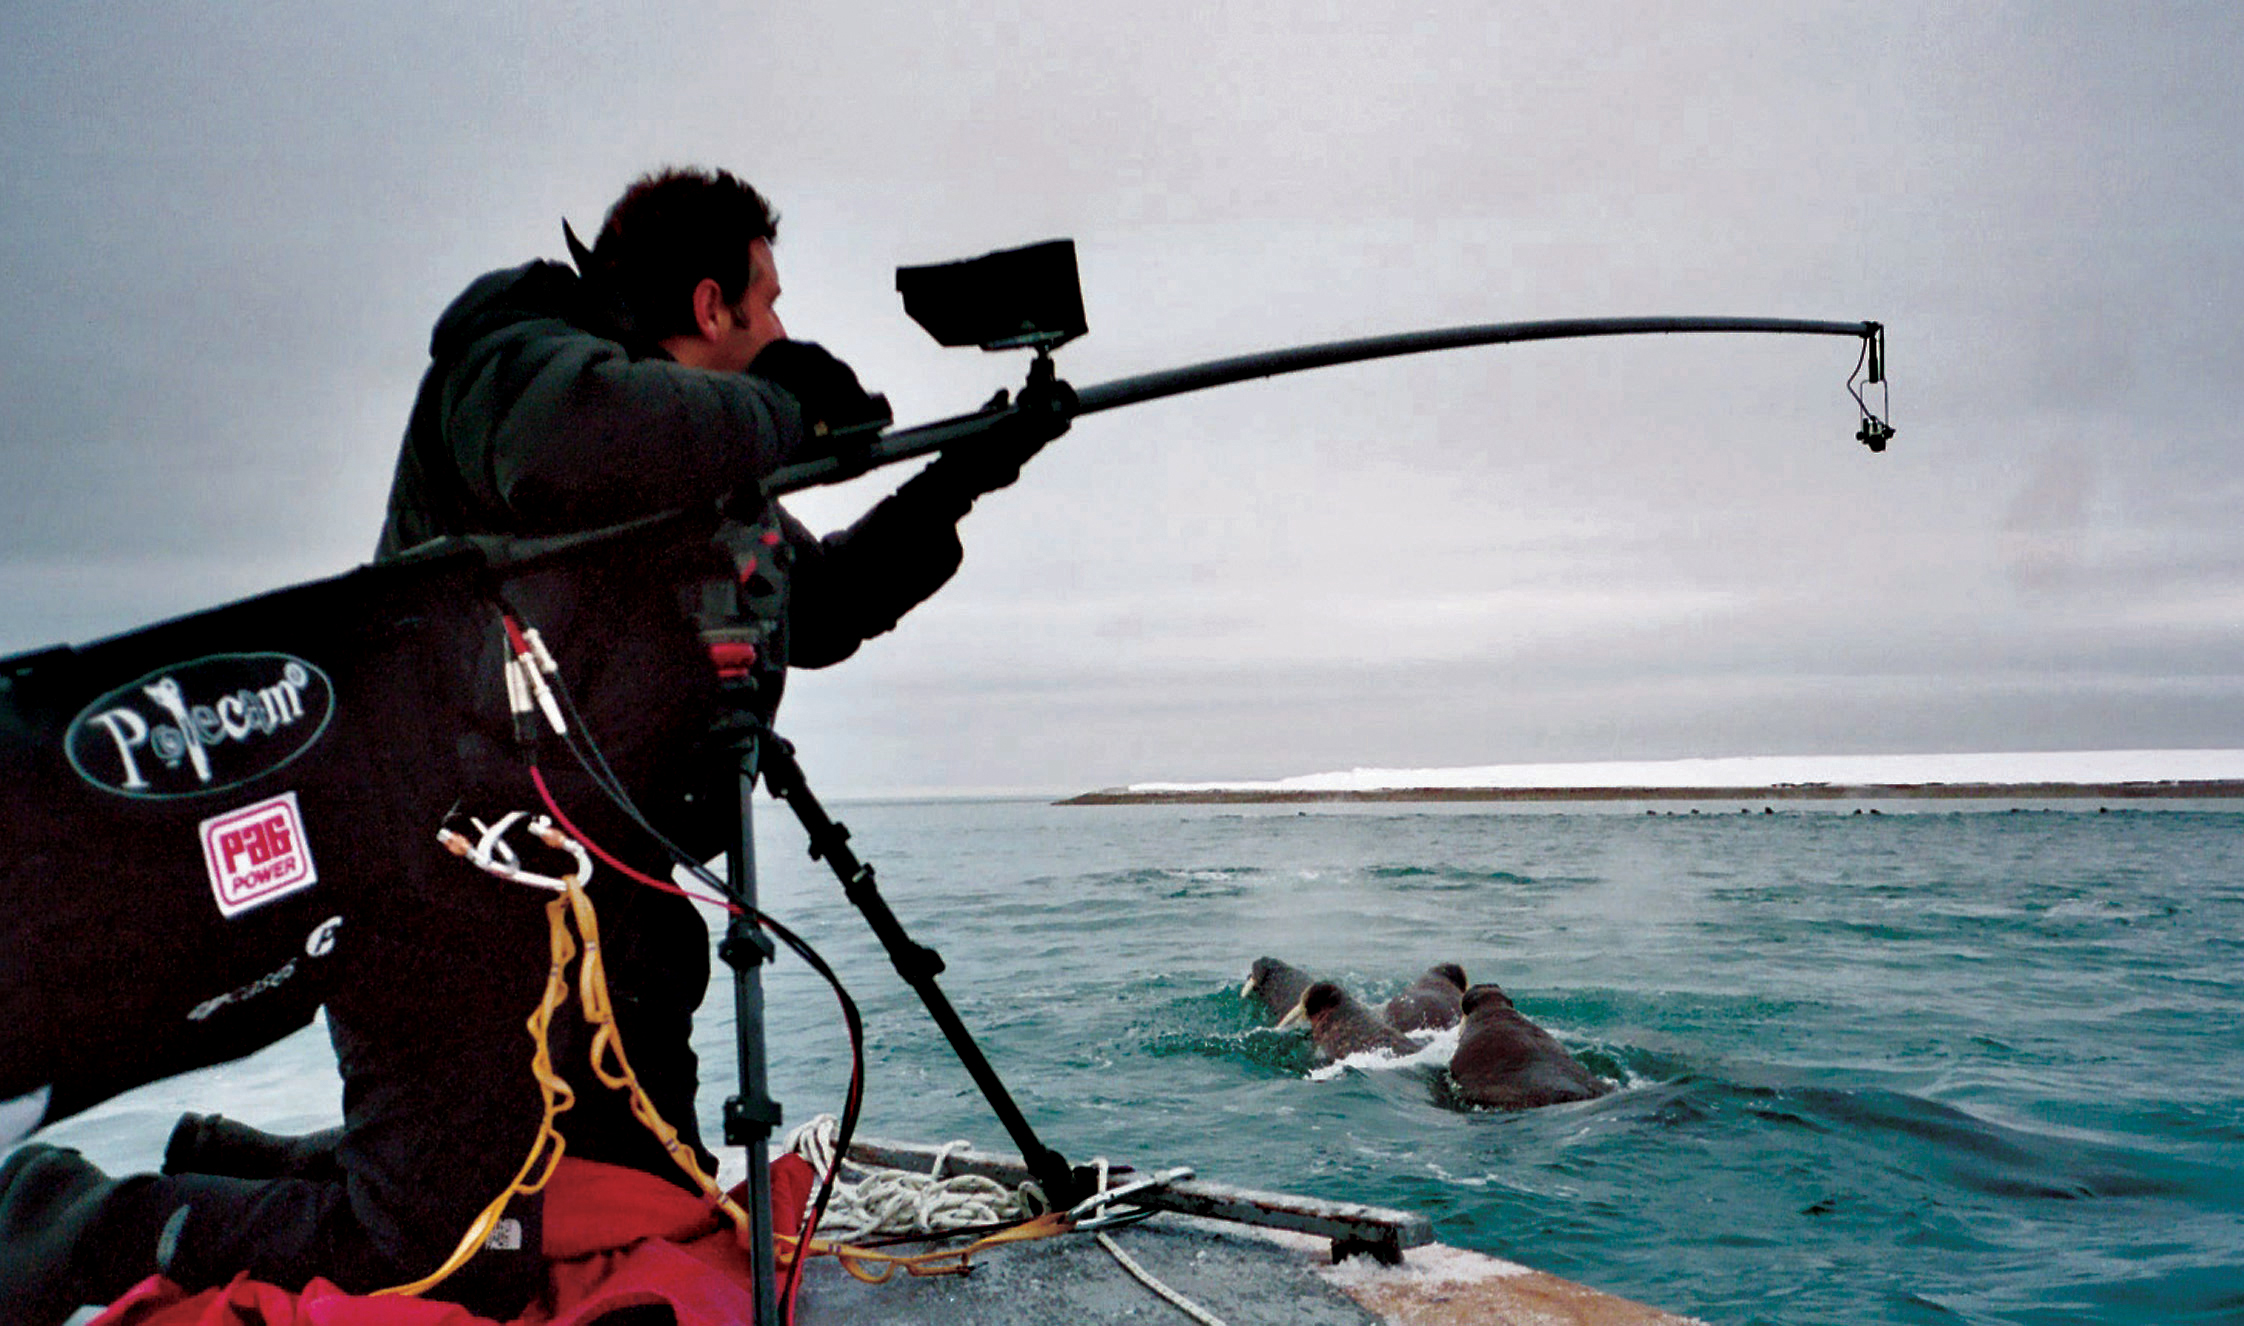
Arctic Polecam: Steffan Hewitt, designer of the Polecam, shoots a walrus colony for National Geographic's Arctic Tale.
That settles it. I want a Polecam. They’re made in the U.K. Price, £15,000. I’d buy one if I had $30,000 spare, I really would.
What to do? Looks simple enough to build something similar. Back to Google — type in “carbon fiber tubing.”
I e-mail Carbon Fiber Tube Shop: “Hi, I want to buy 20′ of tubing.”
“Sure, we can fabricate that for you.”
“You mean you’ve got make it up specially?”
“Tell me the outer dimension, the inner dimension and how you will connect them together.”
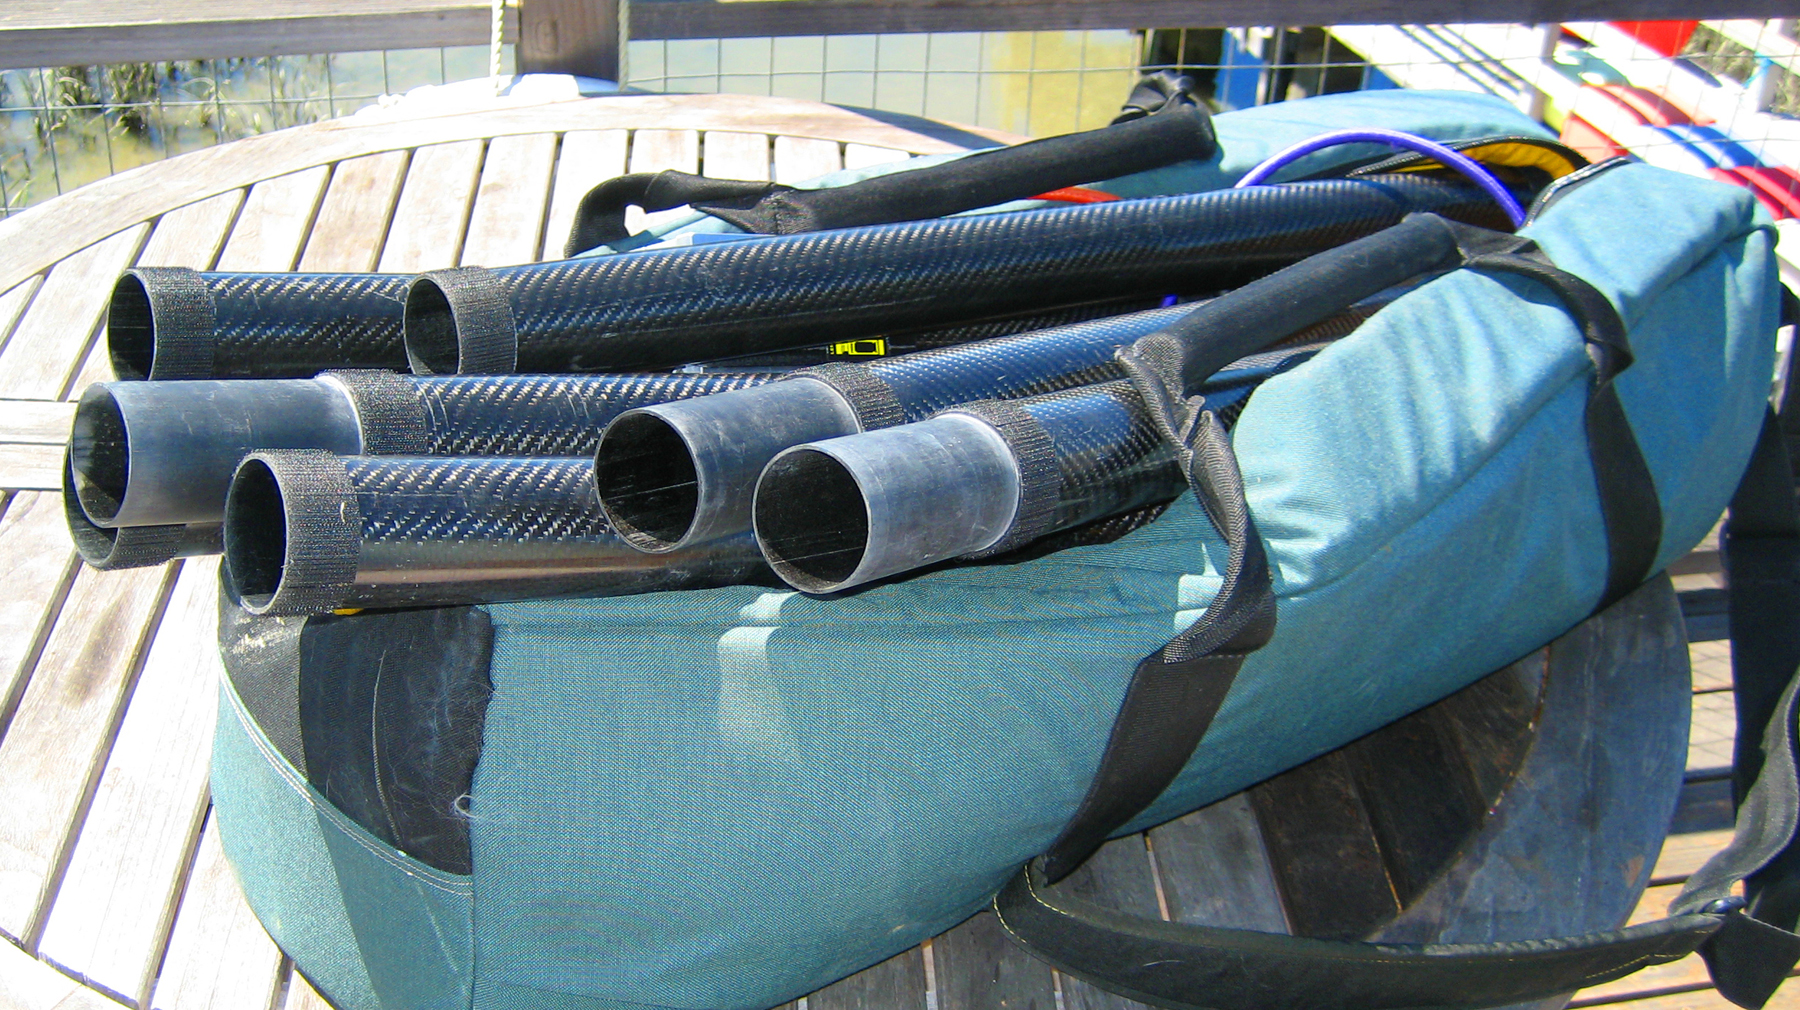
Finally we settle on eight 30″ tubes with a 2.120″ outer diameter and a 2″ inner diameter. Plus a length of 1.995″ OD tubing to chop up into 7″ pieces and use as an inner ferrule connector.
Three weeks later, UPS delivers. I lift out eight 33.5″ lengths of CF tubing. Get out the Alveston kitchen scales: 20′ weighs just 4 lb.!
E-mail to supplier: “Any suggestions for connecting the tubes?”
“Drill holes for pins and a run a cable down the center of the assembly fixed at both ends with a tensioning device.”
Huh? He wants me to drill holes through his beautiful tubes? There must be a better way.
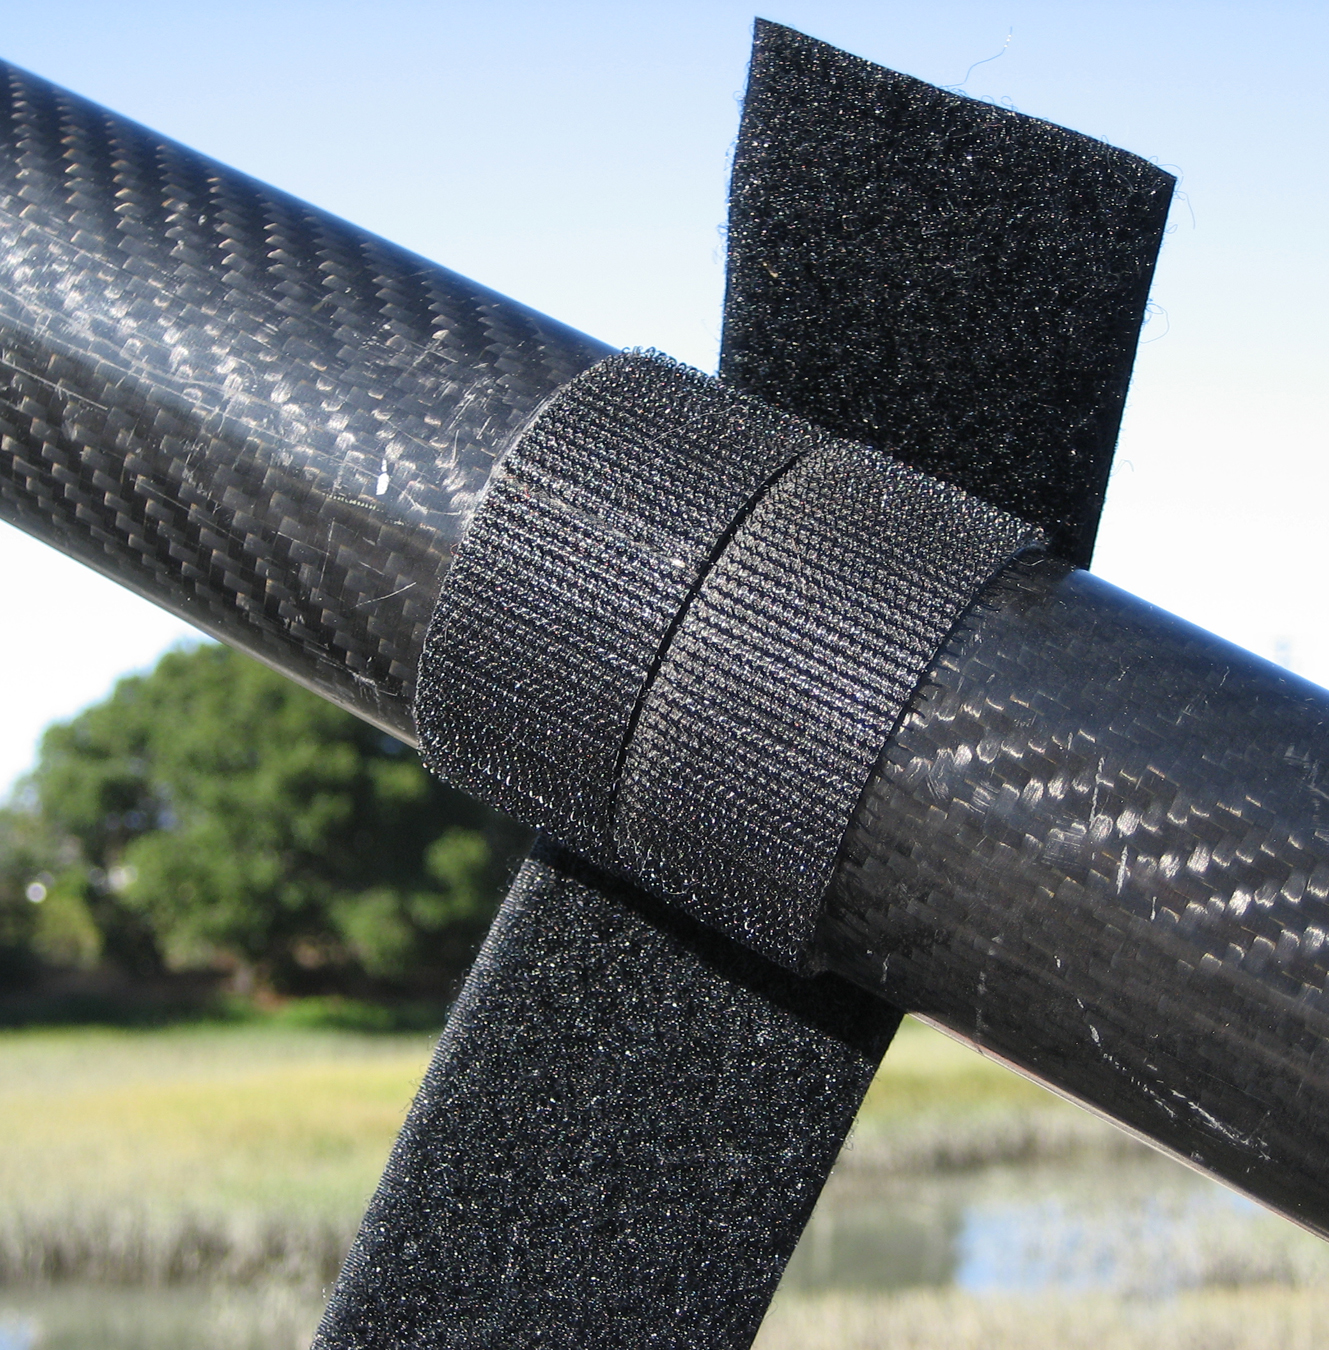
I wake up at 3 a.m. Velcro! I’ll use Velcro strips.
Next day, we order 1″ and 2″ rolls from www.joann.com, a simple and elegant solution.
Test Shoot
The Velcro joint is perfect. Now to try it out. We drive to a vineyard in Petaluma. I’ve no way to fix the pole to the tripod. Gaffer’s tape to the rescue. I screw my camera to a short rod. Push the rod down the tube and jam it with a kitchen paper towel. The camera is upside down. Easy to correct in post.
I try to do what the Polecam people do. They have the monitor and the joystick mounted on the tube. But here in sunny California it’s almost impossible to see the monitor. Not only that, when I swing the pole, I can’t help moving the joysticks. A better solution seems to be for one person to be boom swinger, while the other controls the camera’s pan and tilt. I take the joysticks into the shade of the Ford’s cabin.
We take turns. Tricia’s pole dances are better than mine. I stay inside with the joysticks and monitor, directing, “Go high, drop it down, slowly, stop, keep it steady.” She puts up with a lot.
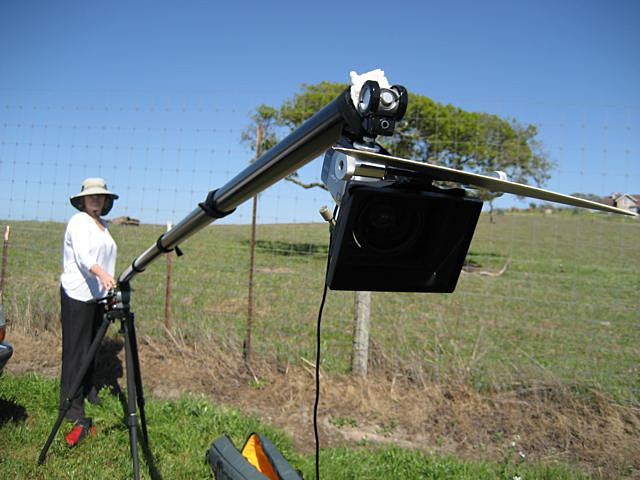
Our first shoot. No pan and tilt. Gaffer's tape connects tube to tripod, paper towel secures camera to pole.
The test video looks terrific. More than a test, it’s useable.
Now to stage two: adding a servo-controlled pan-and-tilt head.
ServoCity
Here’s the problem: I can either buy an assembled pan-and-tilt unit from www.servocity.com or buy individual gears and servos and muddle through. I’m busy shooting a kidney transplant video for the UCSF Medical Center. I buy the expensive ServoCity head.
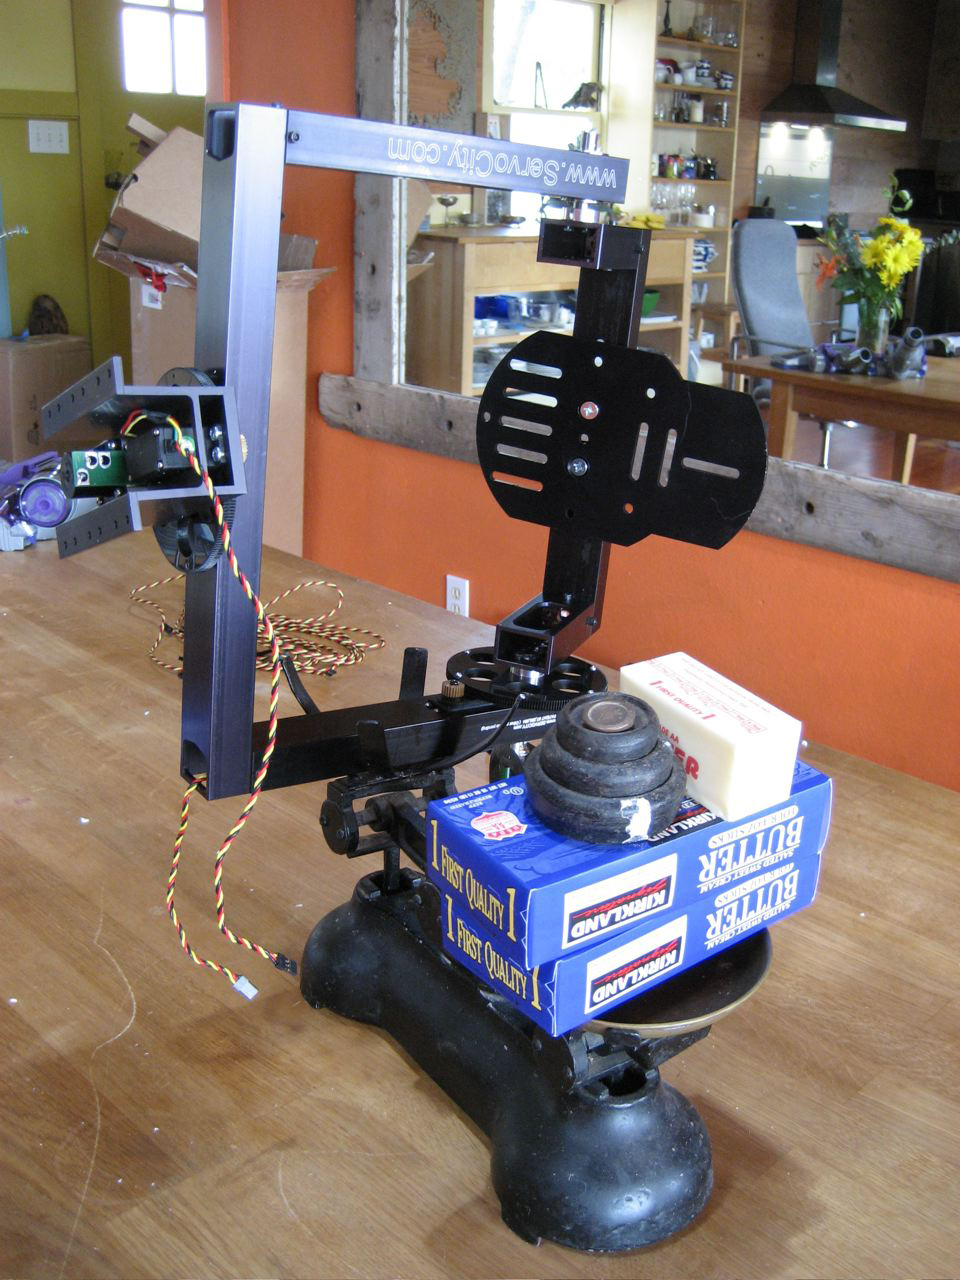
ServoCity's pan and tilt head arrives. Get out the kitchen scales. Tips the scales at less than 4 lb
Oh dear, lift your fingers off the joystick — Zap! — it bounces back to the center position, taking the pan head and camera with it. Tricia takes the springs out of both joysticks. But even now, the slightest touch jerks the servos.
I e-mail tech@servocity.com for a lower gear ratio. No reply. Phone: “Office hours are 9 to 4 Monday to Thursday.” Curse. It’s Friday. Can I leave a message? Of course not. E-mail again. No reply.
Next week, I phone again. Success. I speak to Tom. He’s great, except he sends me the wrong gear. Phone again. Speak to Kyle. He says I have the wrong gear. As if I didn’t know. Speak to Tom. He’s sorry. New gear on the way free of charge. No, they charge me. Oh dear, phone Tom. Damn, it’s Friday. Whaaaa!
First, Find Ron
If you’re going to build your own boom, you’d better find a precision engineer named Ron.
Ron installs the new gear. He’s also going to make an aluminum fitting to mount the tube onto my tripod and a gizmo to hang the pan-and-tilt unit. Ron’s so good (he also makes gadgets for Pixar) that he has very little time. I drive there once a week. “Hi Ron. How’s it going?” A month passes. Two months. It’s tough, I’m suffering severe pole withdrawal.
“Sorry, Ron, I’ll have to take the job away.”
“I don’t blame you, but leave it here, come back next Friday. It will be finished. I promise.”
And it was.
Moment Of Truth
I scurry home. It’s been three months since the tubes arrived. Tripod up. Ron’s new tripod connector clicks a tube into place. Add poles and secure with Velcro. Slide on the pan-and-tilt head.
To balance, Tricia adds sandbag counter-weights. Manfrotto Super Clamps stop them from sliding off. Run the six servo wires inside the CF tubing. Plug connectors into the ServoCity joystick. The tension mounts. This is it. SWITCH ON!
The pan head does three fast rotates — swish, swish, swish! All six wires snap. Sheeeet!!!
Leap into the car and see my friend Mars, who works in the Marin RC Model Shop. I dump the lifeless metal on the counter. “Look, Mars, all six wires are broken.”
“Not a problem, you already have Hitec servos, all you need is a Hitec transmitter and a couple of receivers. $220 for the transmitter — plus two receivers at $36 and a couple of rechargeable NiMH batteries at $25. Not a big deal.”
It isn’t. Mars wires it up. Martian magic! The radio control works!
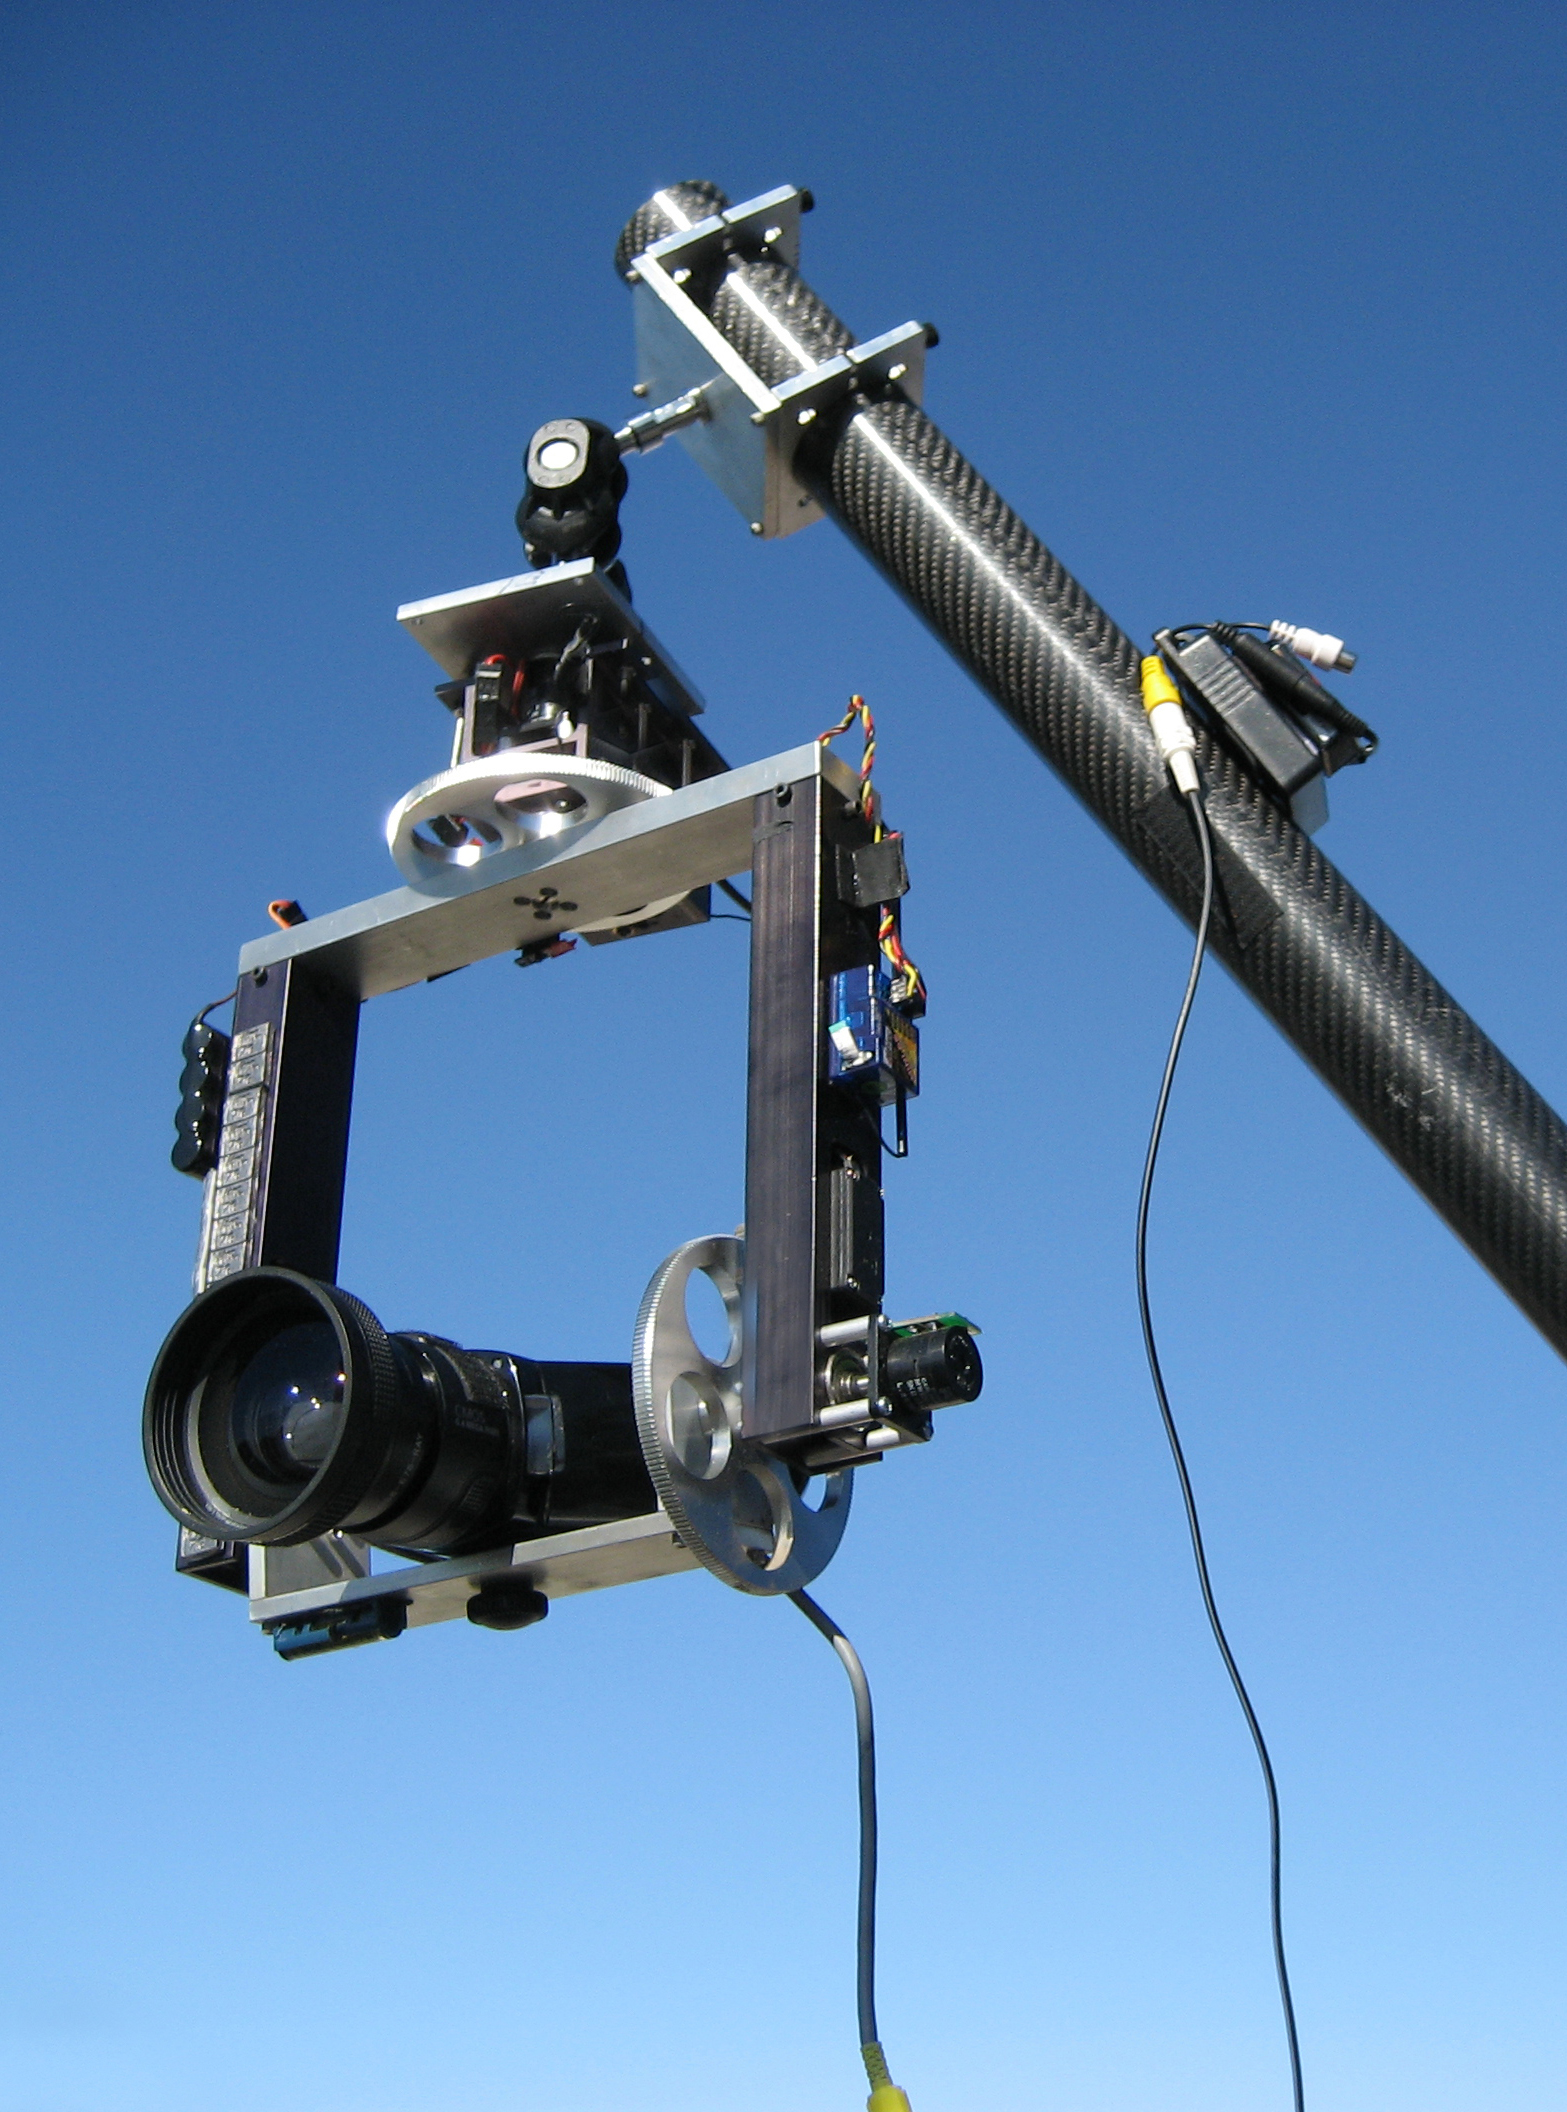
Roman: Receivers and batteries mounted on the frame. Left balancing weights on left arm. Video out to transmitter.
Now to transmit the camera signal back to my monitor. Supercircuits.com has a 2.4 GHz wireless video link for just $88.99. Nah, at that price, it can’t be any good. Why, the Lectrosonics SM audio-only wireless system is over $3,000.
Surprise! The SuperCircuits video link is not only cheap, it delivers a clean, razor-sharp image.
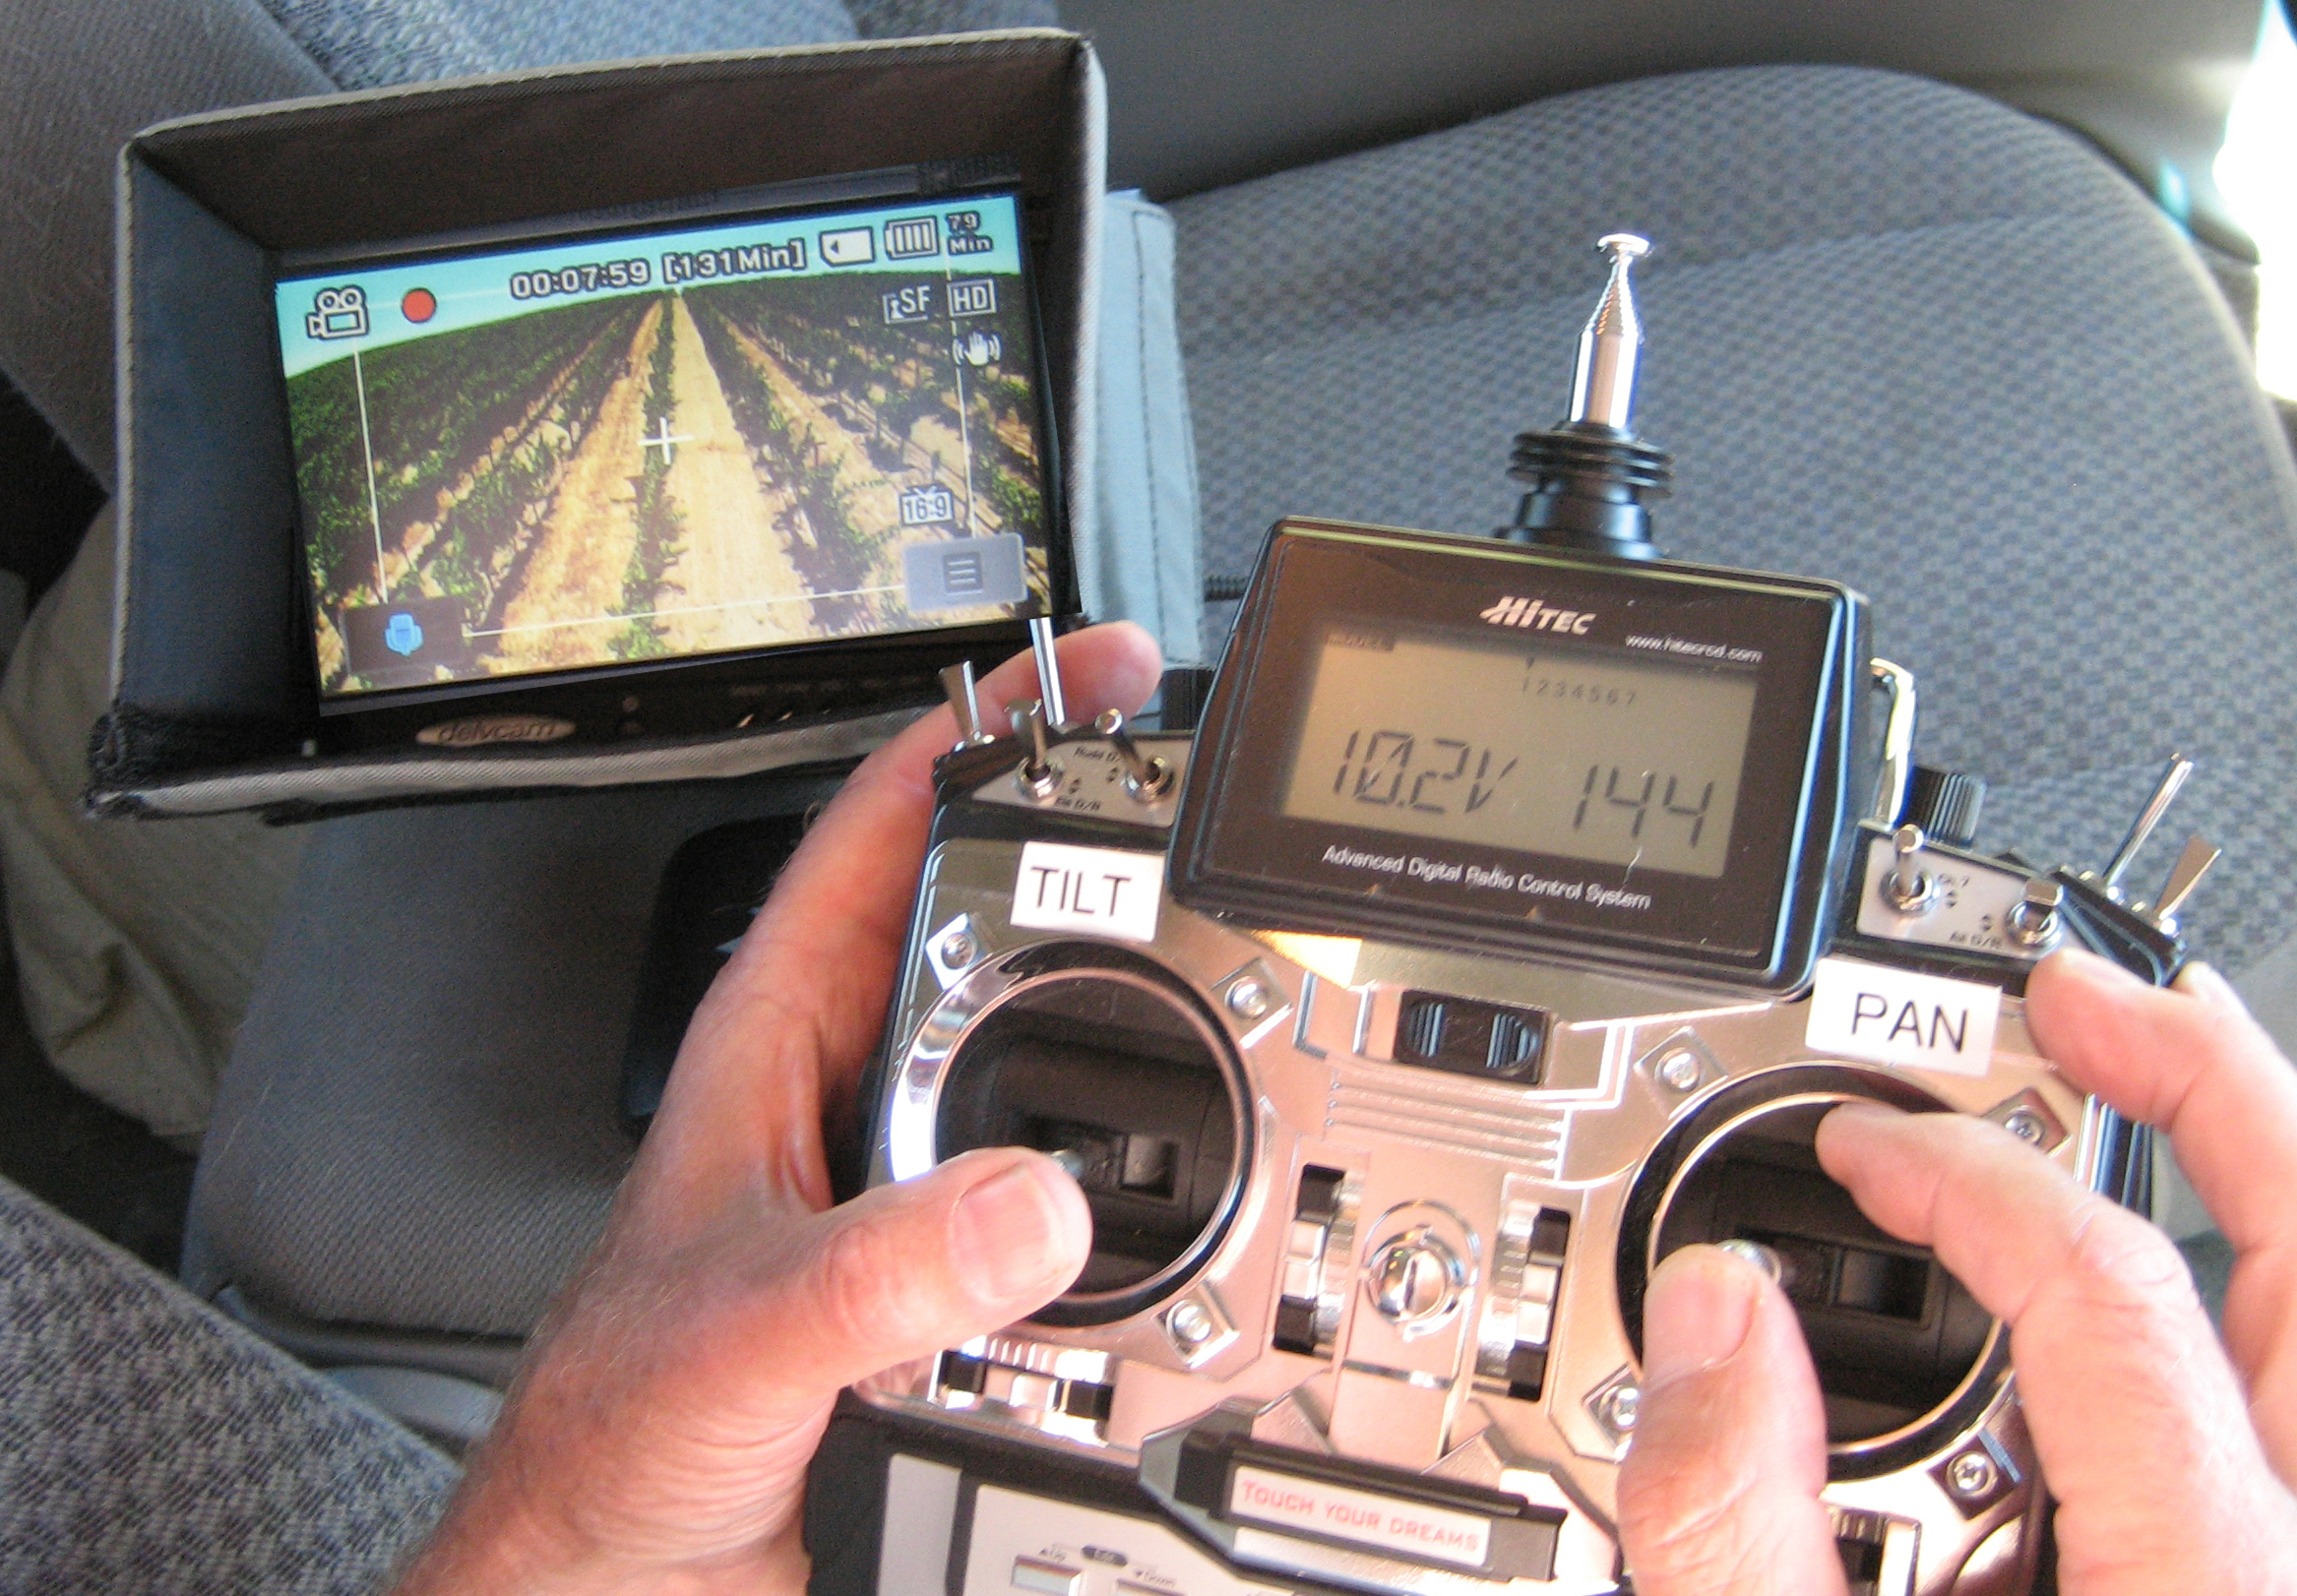
Hitec joysticks and monitor inside Ford cab: Red light, yep, we're recording. 131 minutes left on the 16GB video card. Video link receiver is behind joysticks.
Red light, yep, we’re recording, with 131 minutes left on the 16GB card. Video link receiver is behind joysticks.
It’s a standard-def picture in the monitor, but the camera is shooting true HD. The link shows me that the camera is up and running and how much time is left in both SDHC card and battery.
Look ma, no wires!
Fine-Tuning
Today I discover that I can’t pan a camera that’s fixed to a 60-degree pole. Do it and I get a crazy angle. Ron says I need to hang the camera from a ball-leveling thingy.
B&H Photo has a Bogen double-ball mount. Only $35, plus Ron’s time to mount it. A B&H special order … it takes six e-mails and over a month to arrive. I’m beginning to think $30,000 for a real Polecam might be a bargain.
The head needs balancing. I’m back with Ron making sure that the center of gravity is spot on. I’ve placed spirit levels on both sides and fine-tuned the balance with stick-on lead weights.
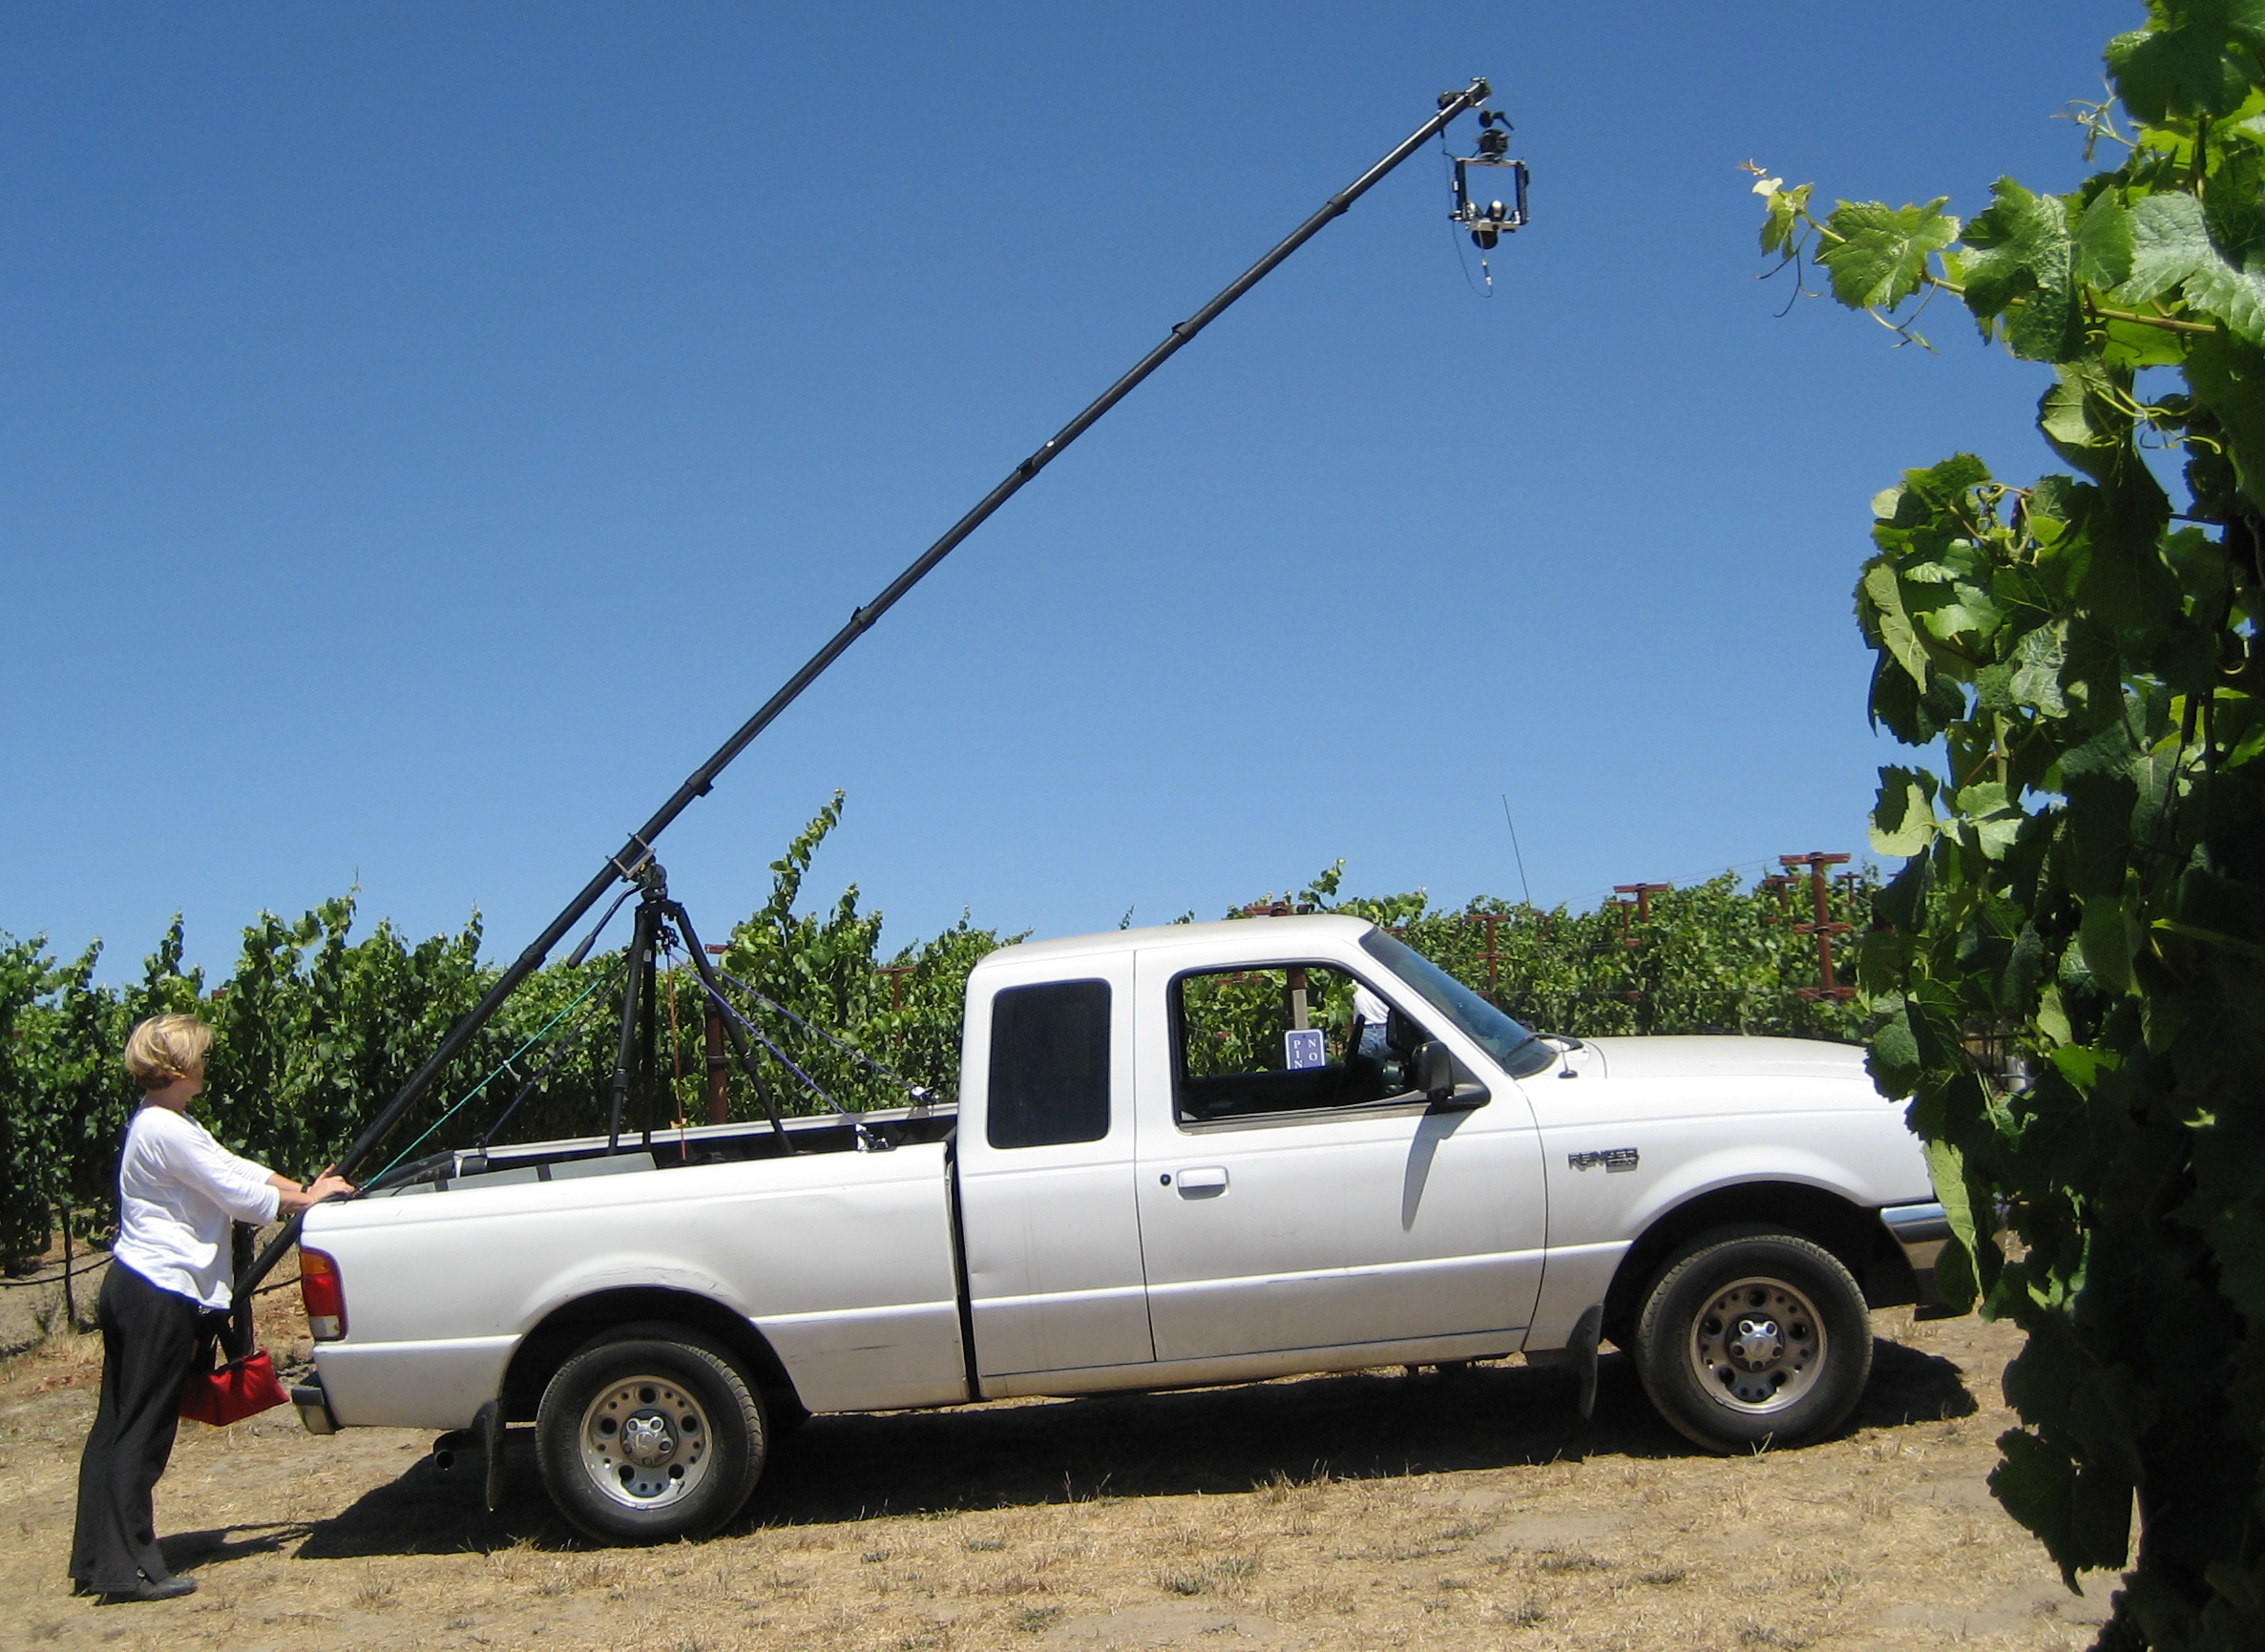
Ford utility and pole above netting: Tricia's in charge of Roman. I pan and tilt Susie. She loves her Raynox DCR-FE180PRO wide-angle lens.
Out And About
Once erected, a tripod with a 20′ pole is almost impossible to reposition. The solution is to fix the tripod to a wooden platform in our pickup. The legs go into metal rings screwed to the wood. Five bungees hold the tripod down and laterally. Not for freeway driving but just the trick once on location. We keep the counterweight end long and operate the pole from terra firma.
Meet Roman
Roman, now with full radio control and wireless monitoring, our pride and joy. Named in honor of Roman Pole-anski. Maximum lift (on tripod, in truck) 25′; weight with RC head, 8 lb.; breaks down to 33.5″ lengths.
Pole jibs are for lightweight cameras, that’s a given.
At just 1 lb., my little Susie (a Samsung SC-HMX20C) is the perfect mate for Roman. Don’t let her $661 (Amazon) price fool you. Stunning HD quality that intercuts with my Sony V1U. Roman also accepts the Sony, but it’s four times heavier. Heavy camera equals more counterweight or less reach.
The Acid Test: Our First Paying Job
It’s a decent-sized-budget video about sulfate of potash (SOP in the business). Here we are in Chico, California, where the almond trees are fertilized with … guess what? While I’m shooting interviews, Tricia sets up Roman and Susie in 10 minutes flat. I come back, switch on the servos, power up the video link and roll camera.

Almond farmers: My own up-and-over shot — inside almond tree, up and over, jib across the dirt track and farmers. Go Roman.
Hey, it’s all working. Tricia’s behind the tripod, controlling pole movements. I’m inside the cab, fingers on the joysticks. “Camera up. Slowly. That’s the height. Swing right. Cue the farmers. Keep going. Slowly. Keep moving right. Cut. We got it!”
The shot’s spectacular. My client is delirious.
The Payoff
Excluding the tripod and camera, Roman, complete with full RC, Mars’ wiring and Ron’s engineering, cost under $3K: a tenth of what I might have paid for the real McCoy.
Roman and Susie, my two new babies, make a great team. We now take them on every shoot and charge extra.

